
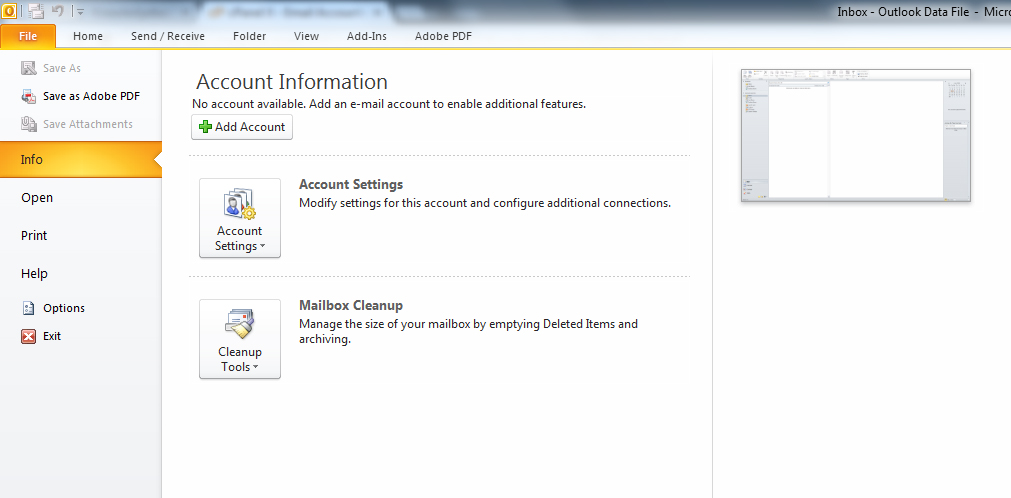
Step 1. Go to File and select Add Account
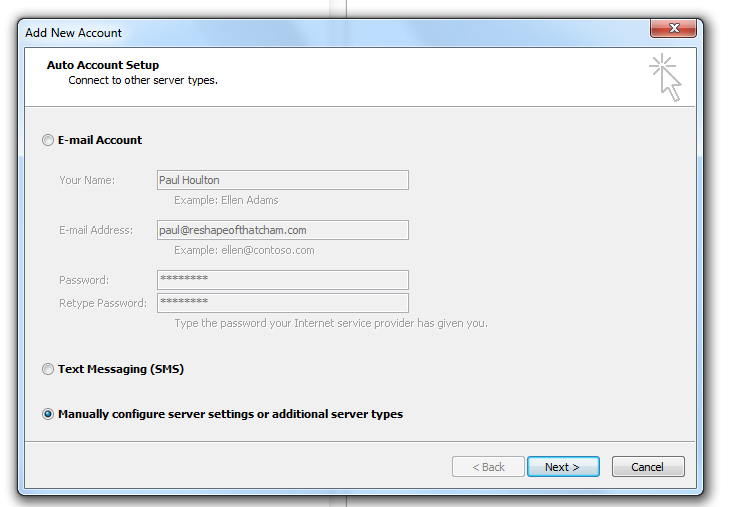
Step 2. Select Manually Configure Server settings click Next
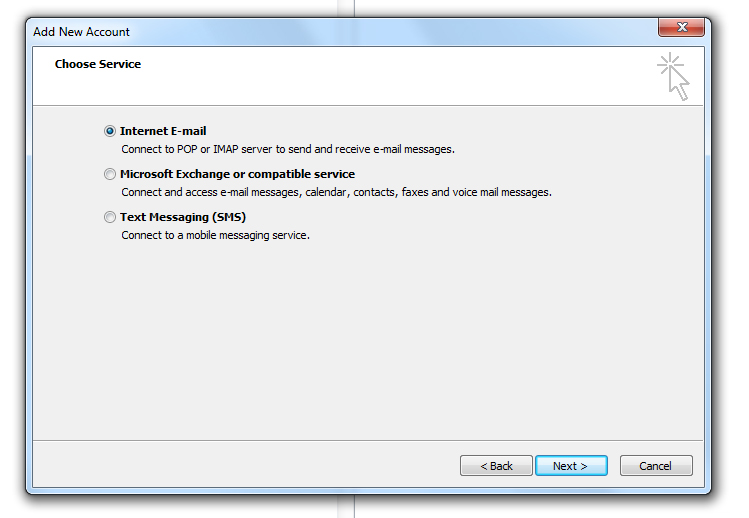
Step 3. Select Internet E-mail then Click Next
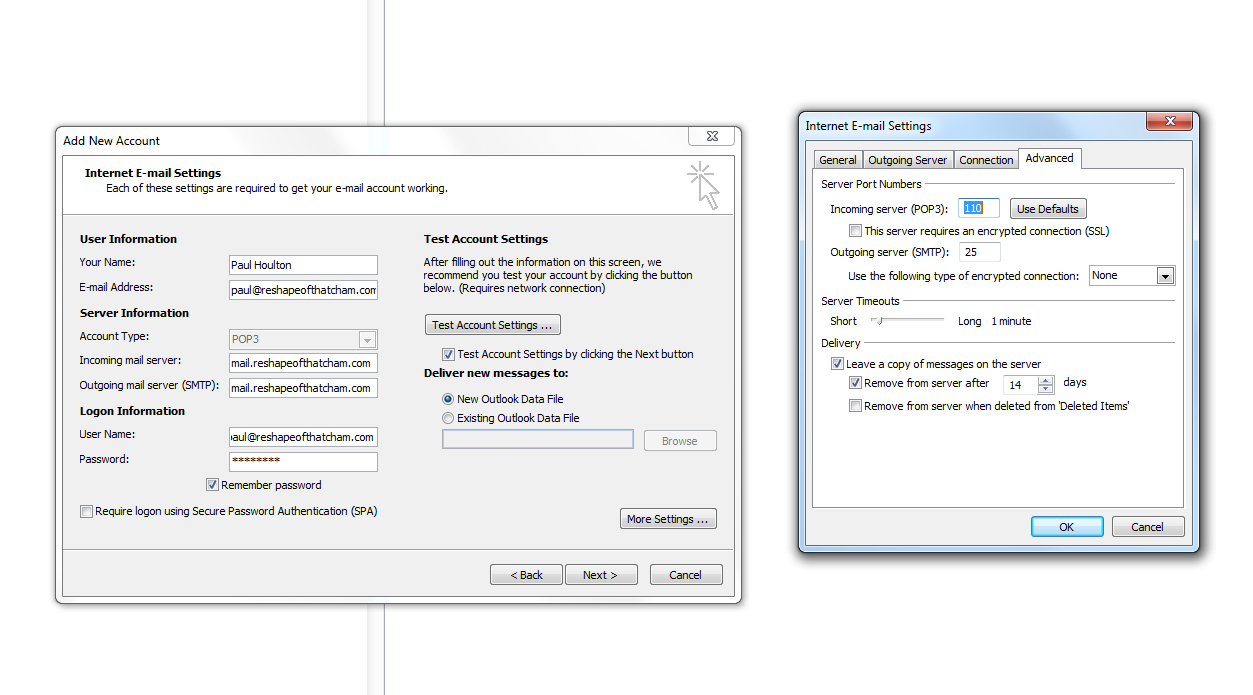
Step 4. Enter your email settings
Remember all mail servers are mail.(thenyourdomainname.com) see below example
The incoming and outgoing mail servers use the same settings
The username is your full email address and then the password is the email password when you set the email up in cPanel
Click Test Account Settings
This will then test incoming and outgoing settings and you should see a green tick by each

IMPORTANT do not select secure password authentication
Step 5. If you wish you can select More Settings
and then the Advanced Tab
This will allow you to set how long the server keeps and handles email
Do not change any of the port settings
Click OK when done and then Next
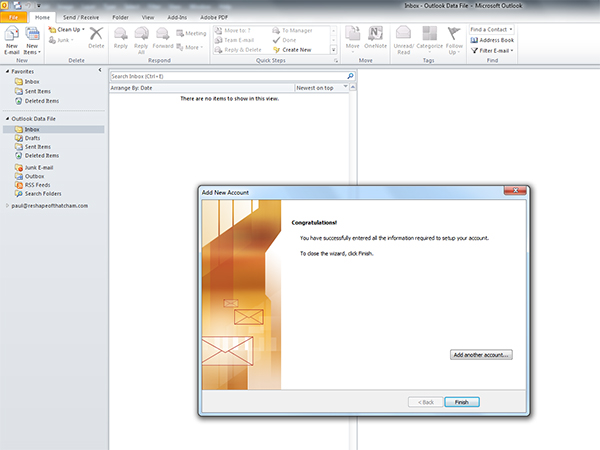
Step 6. Your Done adding a new account
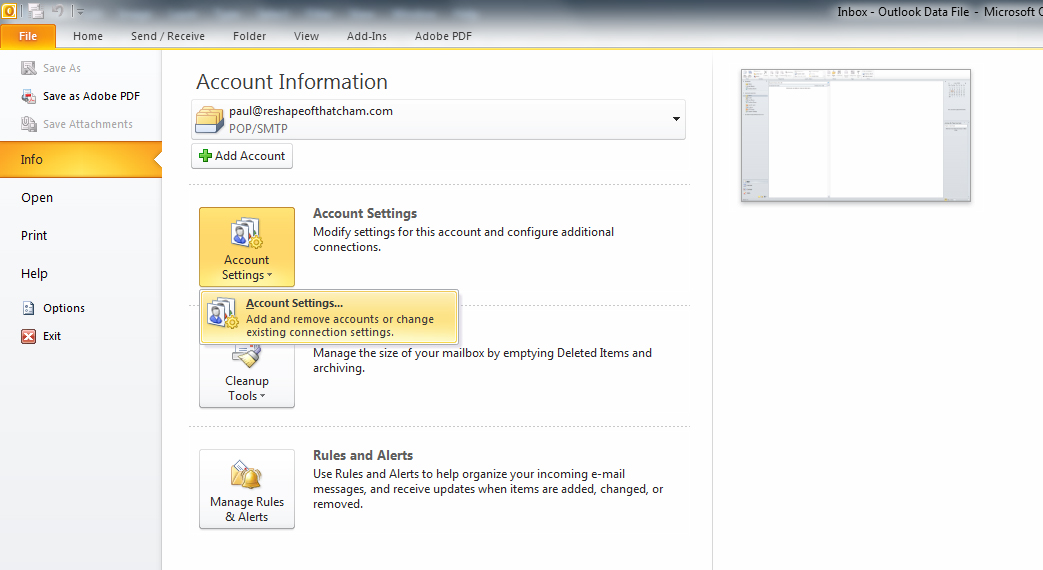
To Edit a password and settings on an existing Outlook Email account
Step 1. Go to File select Account Settings and then select the change existing connection settings tab that drops down
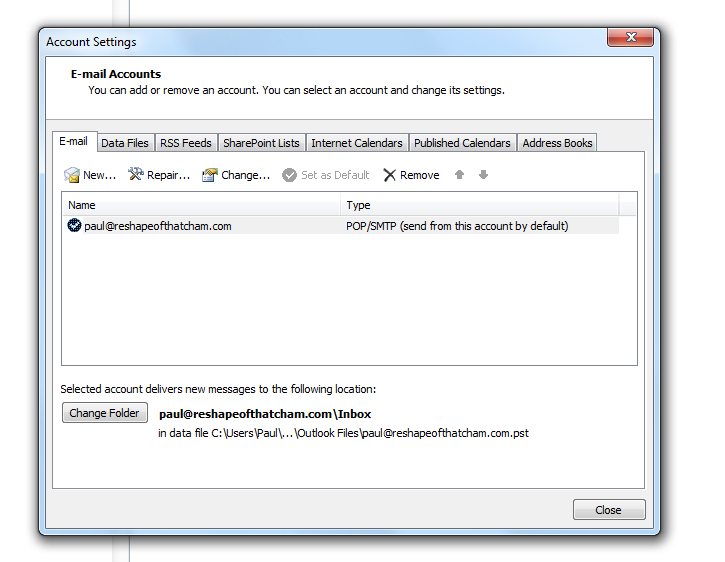
Step 2. You will then see this box
Double left click on the email account you wish to change
Step 3. Change the password or settings you require changing

Step 4. For password changes you may need to click More Settings
Then on the Outgoing Server tab set the outgoing username and password
which will be the full email address you are working on and the email passowrd for that account
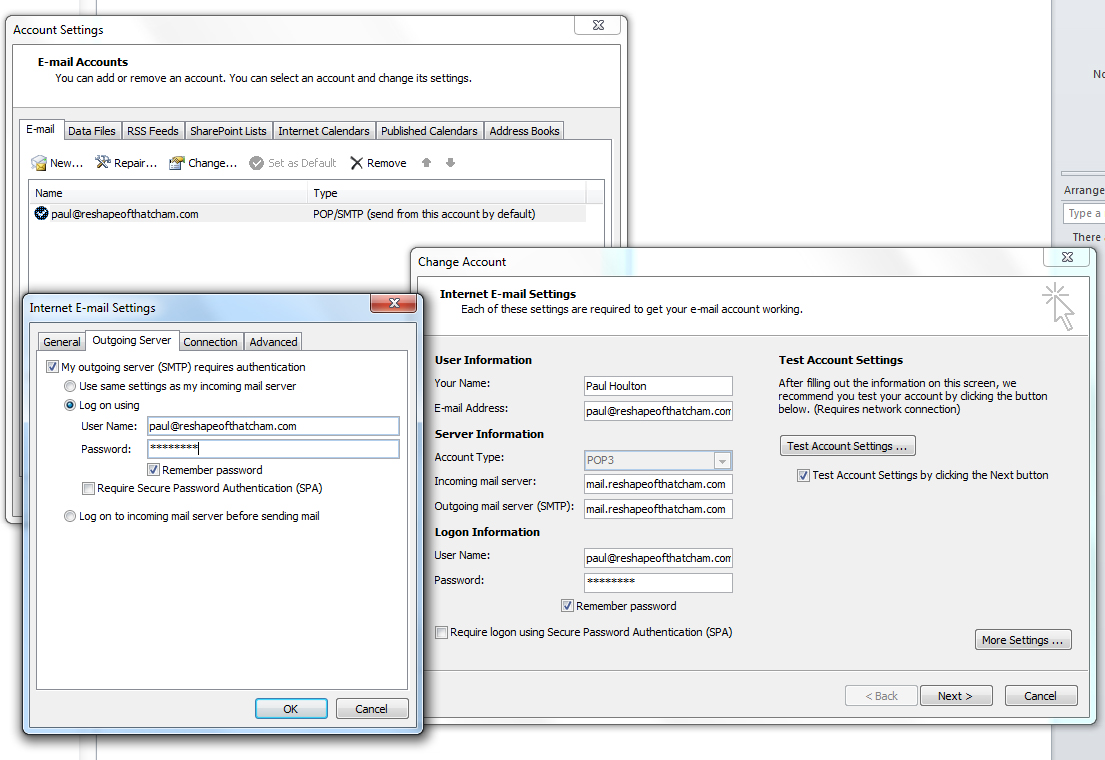
DO NOT select the box Require Secure Password Authentication as this will cause emails to not function
Click Ok and then Next to finish the changes
